Planning holiday parties
By Laura Acklen
www.wpwriter.com
The holidays give us a great excuse to splurge a bit and throw a party. However, splurging does not mean incurring unnecessary expense. Why would you pay for professional printing services when you can print your holiday party cards with WordPerfect®? You can use the money you save to go on a little shopping spree for family and friends.
From start to finish, a holiday party requires invitations, seating cards, gift tags, and thank-you notes. In this tutorial, you'll learn how to create each piece of stationery. You can use these steps later for any type of celebration.
Downloading holiday clipart
The first step to creating a festive card is to locate the right graphic. It can be a clipart image or a digital photograph — whatever suits your purpose. You can search the Internet for "free holiday clipart" or "free holiday photos" and browse through the sites, or you can go directly to a popular free-clipart site.
When you have located the image or images that you want to use, the next step is to download them. In most browsers, you can right-click an image and choose a command such as Save Picture As or Save Image As. Then, you can browse to the folder where you want to store the item and choose Save
Creating invitations
You can print your invitations in a couple of ways. If you want a foldover card, you can purchase prescored card stock, which is frequently referred to as a "half-fold card" and is available at office supply stores (and online). Although some card-stock packages include envelopes, you may need to buy them separately. The 8½-by-5½-inch size is commonly used for greeting cards, so look for "greeting card envelopes."
You can also purchase quarter-fold prescored card stock. This size produces a smaller (4¼-by-5½-inch) card with four sections, instead of the two sections produced by the half-fold card. These cards typically use an "invitation envelope"; you may also see them referred to as "quarter-fold" envelopes
Another option is to print multiple invitations on a single 8½-by-11-inch piece of card stock and then to cut them apart. Printing two or four invitations on a page is a popular option because the envelope sizes needed for the cards are readily available. You can print four invitations on a page and cut them apart into four cards, or you can print two invitations on a page and fold them in half.
In any case, printing more than one invitation per page is a piece of cake. To set the page layout, you just pick one of the label definitions in WordPerfect, and you're ready to go. Choose Format > Labels to open the Labels dialog box. Scroll down through the list of label definitions until you see Avery 3251, which is the first of several definitions for printing half-fold and quarter-fold cards. As you scroll down through the list, the preview area shows you how the cards will be laid out. (see Figure 1)
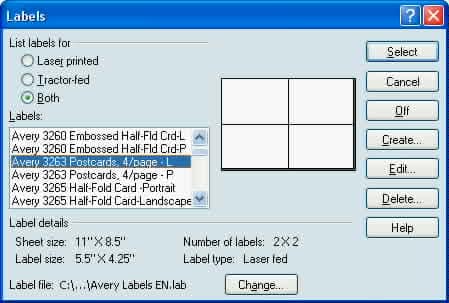
Figure 1
The Labels dialog box contains a list of predefined label definitions for virtually every type of label.
After you locate the definition that matches the number of cards you want to print on a page, select it in the list, and choose Select. When the dialog box clears, you'll see the label page with the insertion point on the first label, or in this case, the first card.
The other pages, or cards, are grayed until you begin to work with them. Press Ctrl + Enter to insert a hard page code in the document, which moves the insertion point to the next card. Continue to press Ctrl + Enter until you have filled the page with cards. You can now see how the invitations will look side by side. (see Figure 2)
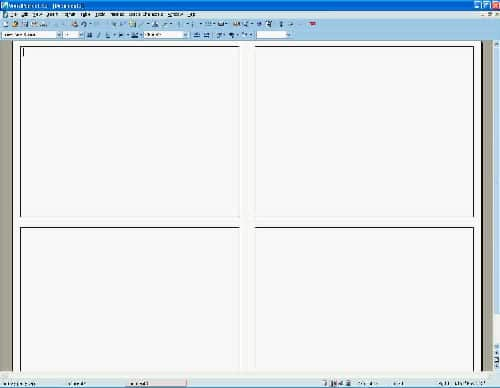
Figure 2
Each card is a logical page, with multiple logical pages appearing on a single physical page. Note: To make it easier to see the separate cards, a thin black border was added.
Next, move back to the first card, and start creating the invitation. Choose Insert > Graphics/Pictures > Clipart, and browse to the clipart file that you downloaded. When the image appears in the document window, it will be placed in a graphics box with sizing handles around it (Figure 3). The sizing handles let you resize the graphics box.
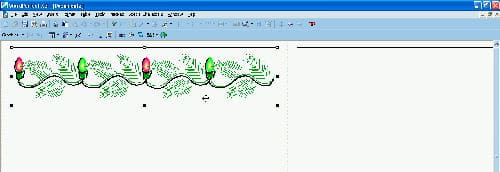
Figure 3
When the four-headed arrow appears, you can drag the graphic box to a new location.
To resize the box, move the pointer to a sizing handle, and wait for it to change into a double-headed arrow. Drag a corner handle to resize the height and width at the same time, so that the proportions are maintained.
To move the box, place the mouse pointer inside the graphic box to change the pointer to a four-headed arrow (refer back to above). Drag the graphics box around on the page until you are satisfied with its position.
Choose an attractive font and font size, and create the text of your invitation. When you are happy with the way everything looks, you are ready to copy the invitation and paste it to the other cards.
To make sure that you are selecting the entire invitation, press Ctrl + Home twice so that the insertion point is moved to the top of the document, before any codes. Hold down the Shift key, and use the Down arrow to select the graphic box and the text of the invitation. Press Ctrl + C (or choose Edit > Copy) to copy the selection. Move to the top of the next card. Press Ctrl + V (or choose Edit > Paste) to paste the selection into the second card. Move to the top of the next card, and paste the selection. Continue pasting the selection until you have filled the page (see Figure 4). That's it — you're done! All you need to do now is print on the card stock and then fold or cut the card stock into cards.
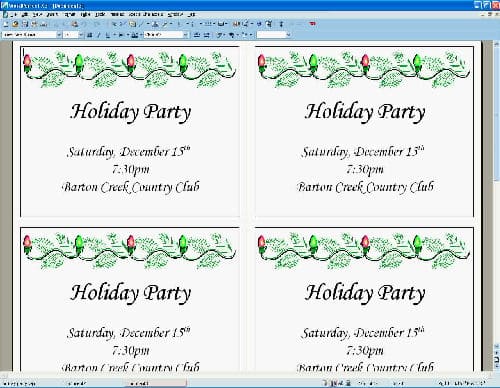
Figure 4
The simplest way to create a page full of cards is to create one card, and then copy and paste it to the other cards.
Creating seating cards
The same concepts discussed above can be applied to your seating cards — you simply select a label definition to set up the formatting, and away you go. You might be thinking that seating cards are for formal gatherings only. Not true! Have a little fun by adding amusing anecdotes, or clever or embarrassing nicknames
Seating cards can be printed on a piece of 8½-by-11-inch heavy card stock and then cut into individual cards. Alternatively, you can opt to print on microperforated business cards, which tear apart easily and are just the right size. You can find these business cards in a variety of fun colors and textures.
Choose Format > Labels to open the Labels dialog box. Scroll down to Avery 25371 Business Cards, and choose Select. With the insertion point at the top of the first card, repeat the process described previously for inserting a graphic or picture, and then add the text for the seating card. When you are finished, insert the business card sheets, and print.
Creating gift tags If you are exchanging gifts at your holiday party, use the same theme for your gift cards that you chose for the party invitations and seating cards. You can also use these steps to create gift tags for your holiday gifts. Adhesive address labels also make great gift tags and are available in a variety of sizes.
Choose Format > Labels to open the Labels dialog box. As you can see from the list of label definitions, WordPerfect works closely with Avery to ensure that the list is kept up-to-date and accurate. Even if you purchase a different brand of labels, the built-in definitions can be used. Simply match up the number of labels per page, or the label dimensions, to locate the correct definition.
When you locate the definition that most closely matches your label sheets (the preview area really helps you here), select it in the list, and choose Select. Repeat the process described earlier to insert a graphic or picture (see Figure 5). To use the same graphic or picture multiple times, use the copy-and-paste procedure. If you like, add "To:" and "From:" titles to the tags before you print them.
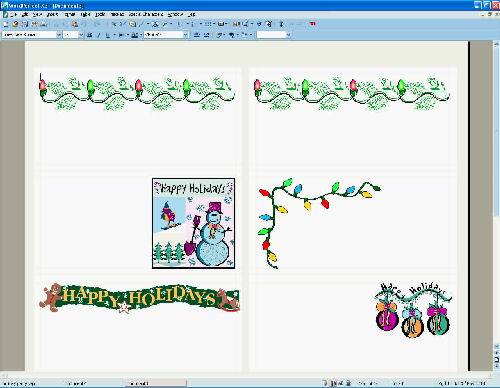
Figure 5
You can create a sheet of identical gift tags, or you can use a different image for every tag.
Creating thank-you notes
After the guests leave and you breathe a sigh of relief that everything went smoothly, your last task is to prepare thank-you notes. The steps for producing thank you notes are essentially the same as those for creating the invitations — with one possible exception. On half-fold cards, it's common to have "Thank You" or "Thanks" on the front (see Figure 6). So, if you opt for half-fold cards, rather than creating the text for the inside of the card, you are actually designing the front of the card and leaving the inside blank for a handwritten note.

Figure 6
Thank-you notes usually have a design on the front.
In fact, you can include a nice border around the greeting that you choose for the front of the card. WordPerfect has a great collection of page borders that can be used, from simple thick borders to elegant or fancy borders. Choose Format > Page > Border/Fill to open the Page Border/Fill dialog box.
To get a better idea of how a border will look on your card, click one of the borders in the Available border styles box to display it in the preview area (see Figure 7). Scroll down through the Available border styles box to see the complete collection. Click the Border type drop-down list arrow, and choose Fancy to see the decorative borders.
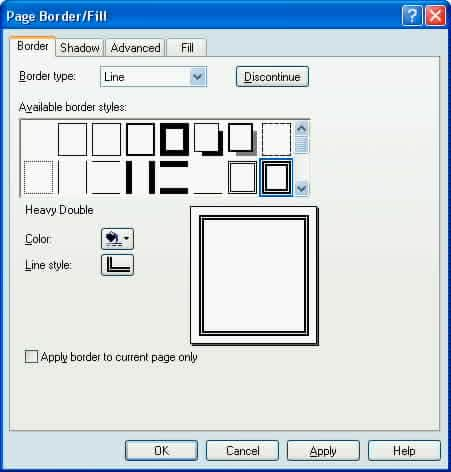
Figure 7
The Page Border/Fill dialog box has both line and fancy borders to choose from.
Printing on both sides of a half-fold card
If you like, you can include text on the inside of a thank-you card (or the outside of a party invitation) by simply reinserting the card stock and printing on both sides. Create two pages with the first page containing the front of the card and the second page containing the text that you want to print on the inside. Print the first page, reinsert the card stock, and then print the second page.
Because printers differ in how they feed and print on card stock, it's best to experiment a bit before you print on the card stock. To learn how to rotate the card stock so that the "Thank You" isn't upside down, take a plain piece of printer paper, and number the four sections of the page. Do the same on the other side of the paper. Print several sample pages until you learn how to reinsert the paper correctly for the second printing.